


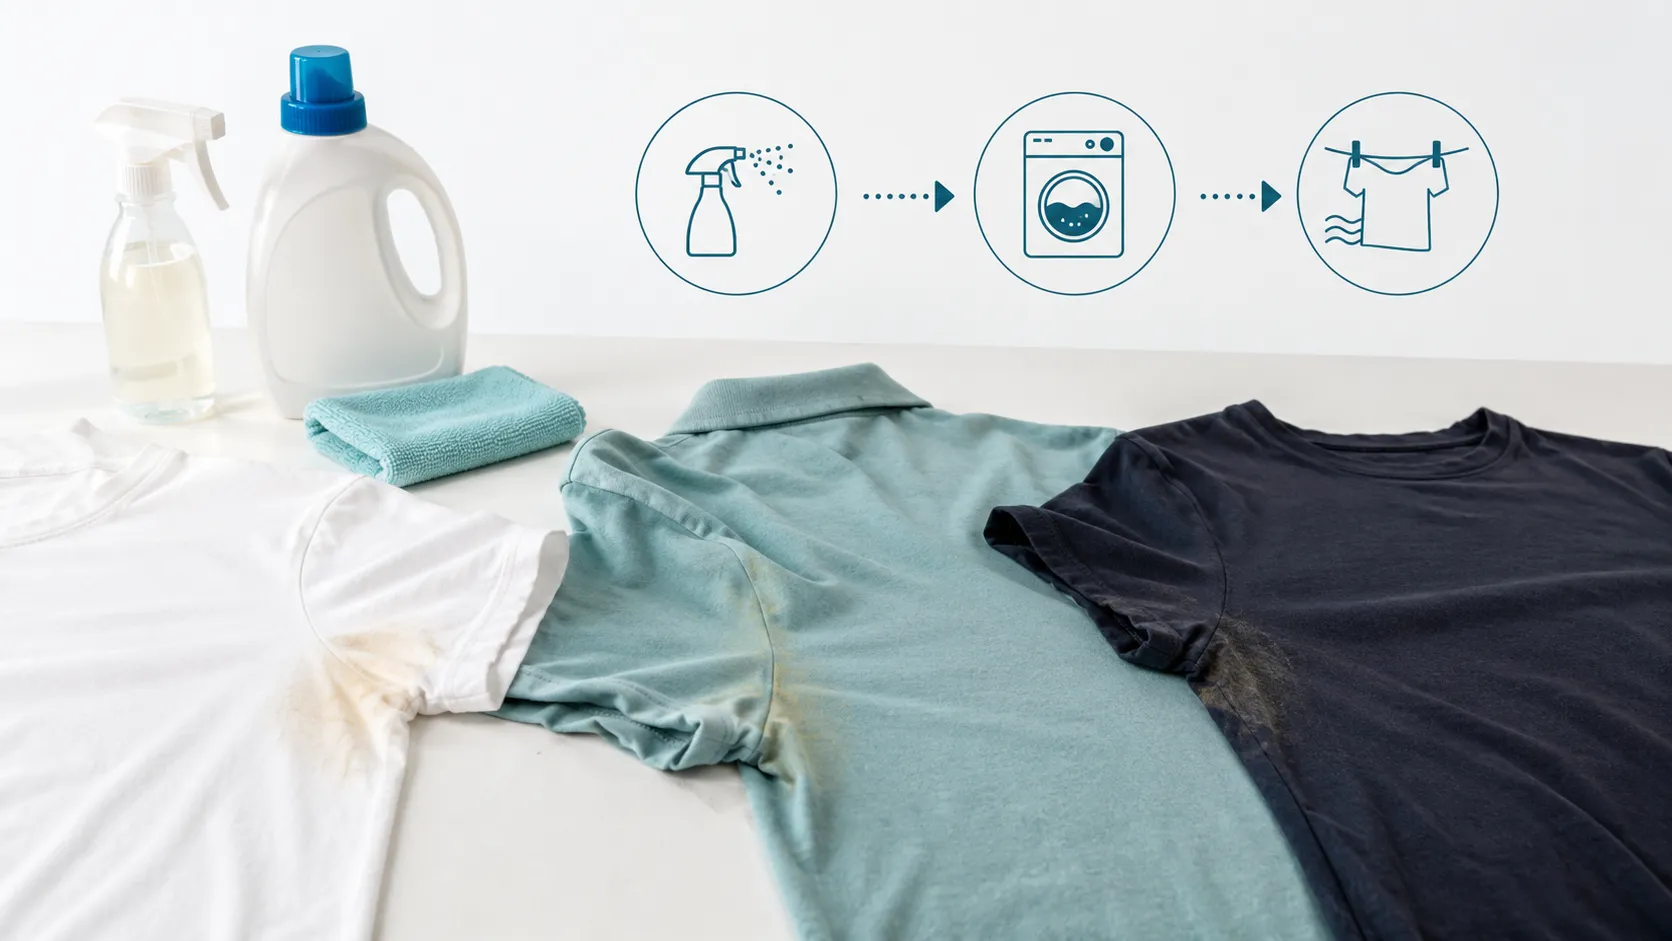
The safest way to remove armpit stains is to treat the underarm area before washing and never use dryer heat until the mark is gone. Learning how to remove armpit stains from shirts starts with checking the fabric, because white cotton, dark T-shirts, colored shirts, dress shirts, and delicate fabrics do not all need the same stain treatment.
Most underarm stains come from sweat, body oils, deodorant, and antiperspirant residue trapped in the fibers. Yellow patches on white shirts may need oxygen bleach or enzyme detergent, while dark or colored clothes need a color-safe method to avoid fading. This guide explains how to identify the stain, pretreat it safely, choose the right method by shirt type, handle old yellow marks, and stop the stains from coming back.
Key Takeaways
- Treat underarm marks before putting clothes in the dryer.
- White shirts can often handle stronger stain treatments than dark or colored clothes.
- Yellow pit stains usually come from sweat, body oils, and antiperspirant residue.
- Old marks may need soaking and repeat treatment.
- Always check the care label before using peroxide, oxygen bleach, vinegar, or stain remover.
- If the same marks keep coming back, prevention matters as much as stain removal.
What Causes Underarm Marks?
Underarm stains are usually not caused by sweat alone. They often form when moisture mixes with body oils, salt, skin proteins, deodorant, and antiperspirant residue.
On white fabric, this buildup often turns yellow. On colored or dark clothes, it may look gray, white, waxy, or darker than the rest of the material. Over time, the underarm area may also feel stiff because residue has built up in the fibers.
Antiperspirants can make the problem worse for some garments. Many formulas use aluminum-based ingredients to reduce sweating. When those ingredients mix with moisture and body oils, they may contribute to yellow or discolored patches.
Washing alone does not always remove trapped residue. If the garment goes into the dryer before the mark is gone, heat can make it harder to remove later.
What Type of Underarm Stain Do You Have?
Before treating the garment, look closely at the mark. Different underarm problems need different first steps.
| Stain Type | What It Looks Like | Likely Cause | Best First Step |
|---|---|---|---|
| Yellow pit stain | Yellow patches on white or light fabric | Sweat, body oil, and antiperspirant residue | Oxygen bleach or enzyme detergent |
| White residue | Chalky or waxy marks | Deodorant buildup | Mild dish soap or stain remover |
| Dark underarm mark | Gray, brown, or darker fabric | Body oil, product residue, or trapped soil | Color-safe stain remover |
| Old set-in stain | Yellow or stiff underarm patch | Repeated washing and drying | Soak, pretreat, and repeat |
| Mark with odor | Discoloration plus underarm smell | Sweat residue trapped in fibers | Enzyme detergent or odor-safe wash |
This step matters because a method that works on white cotton may fade black fabric or damage delicate material.
Before You Treat the Fabric
Always check the garment care label first. If it says dry clean only, mild detergent only, or no bleach, follow that instruction instead of using a strong stain treatment.
Next, test the cleaner on a hidden area. This is important for colored clothes, black fabric, prints, and delicate materials. Apply a small amount inside a hem or seam, wait a few minutes, then blot it with a white cloth. If color transfers or the fabric changes, do not use that method.
Avoid harsh scrubbing. Rubbing too hard can roughen cotton, stretch knits, or weaken delicate fibers. Instead, gently work the product into the affected area with your fingers, a soft cloth, or a soft laundry brush.
Most importantly, do not dry the garment until the mark is gone. Dryer heat can set underarm residue and make it harder to remove, especially when you are trying to prevent stains from setting permanently
Best Way to Remove Armpit Stains
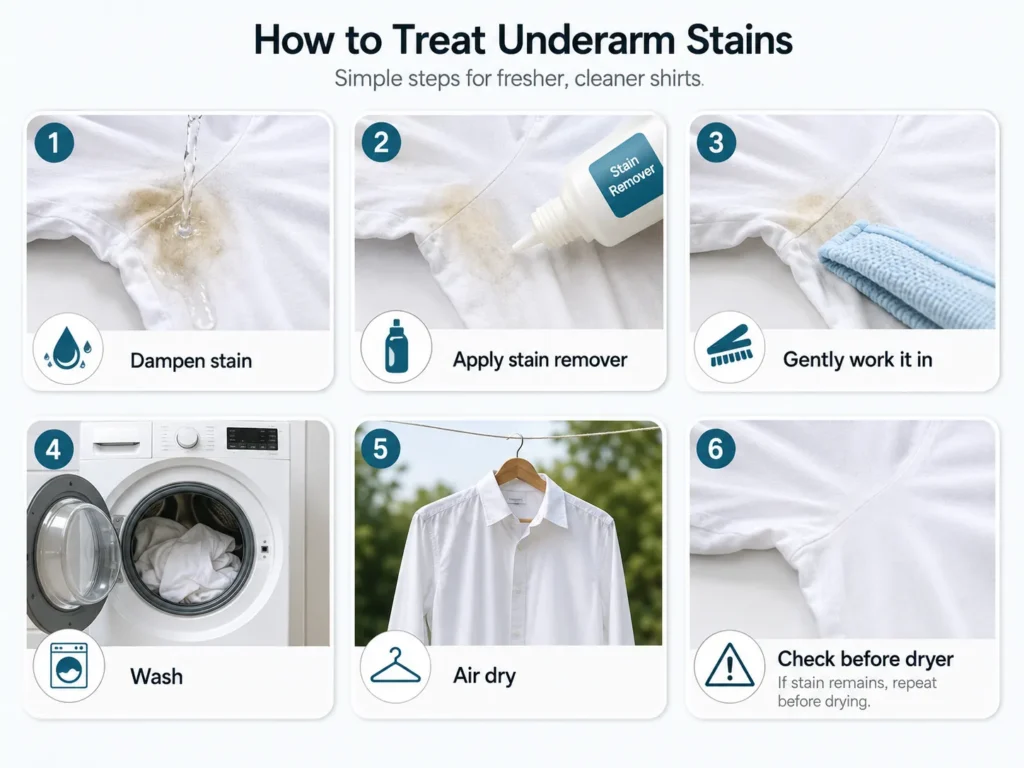
This method works for many washable shirts when the care label allows stain treatment.
Follow these steps:
- Turn the garment inside out so you can reach the underarm area.
- Dampen the mark with cool or lukewarm water.
- Apply a fabric-safe stain remover, enzyme detergent, mild dish soap, or baking soda paste.
- Gently work the treatment into the fabric.
- Let it sit for 10 to 30 minutes, or follow the product label.
- Wash according to the care label.
- Air dry and check the fabric before using dryer heat.
- Repeat if the mark is fading but still visible.
For fresh marks, this may be enough. However, old yellow patches often need soaking and repeat treatment before they improve.
Stop repeating treatment if the fabric starts fading, thinning, stretching, or feeling rough. At that point, stronger cleaning may damage the garment more than it helps.
For White Shirts
White shirts often show yellow underarm marks more clearly than colored clothes. They can also handle some stain treatments that are too risky for dark fabric.
For washable white cotton, start with oxygen bleach or enzyme detergent. Oxygen bleach can help lift yellowing without the same harsh effect as chlorine bleach. Enzyme detergent can help with body soil and some organic residue, but it may not remove every yellow mark by itself. If the shirt is white cotton, choosing the right water temperature for white clothes can also help protect the fabric while cleaning
If the care label allows it, hydrogen peroxide may help on white or light fabrics. Use a small amount on the affected area, let it sit briefly, then wash. Still, test first if the garment has trim, prints, stitching, or mixed fabric.
Avoid using chlorine bleach as your first fix. It may seem like the strongest option, but it can react poorly with some sweat-related discoloration and may make yellowing look darker. It can also weaken fabric when used too often.
After washing, air dry the garment. If the yellow patch remains, repeat the treatment before using the dryer.
For Colored and Dark Shirts
Colored and dark shirts need a safer approach because strong whitening products can fade dye.
Start with a color-safe stain remover or enzyme detergent if the garment label allows it. For waxy residue, a small amount of mild dish soap can help loosen greasy buildup before washing.
Use cool or lukewarm water first. Then gently work the treatment into the underarm area and let it sit for the recommended time. Wash with similar colors and air dry before checking the fabric.
Avoid hydrogen peroxide, lemon juice, and sun bleaching on dark clothes unless you have tested the fabric first. These methods can lighten dye or leave uneven patches.
For black shirts with white product marks, focus on removing buildup rather than bleaching the fabric. Mild soap, proper rinsing, and a color-safe laundry product are usually safer than strong DIY mixtures.
Old Yellow Underarm Marks
Old yellow pit stains are harder to remove because they have usually gone through several wash and dry cycles. The mark may be set into the fibers, and the underarm area may feel stiff from trapped residue.
Start by soaking the affected area in cool or lukewarm water. This helps soften buildup before treatment. Then apply oxygen bleach, enzyme detergent, or a fabric-safe stain remover if the care label allows it.
Let the treatment sit long enough to work. For set-in marks, a short contact time may not be enough. After soaking or pretreating, wash normally and air dry.
If the stain improves but does not fully disappear, repeat the process. Old yellowing may need two or three rounds. However, some long-set discoloration may only fade, especially if the garment has been dried many times.
Do not scrub hard to force the stain out. Aggressive scrubbing can damage the underarm area and leave the fabric looking worn.
Best Treatment by Shirt Type
Dress shirts, cotton T-shirts, polyester blends, dark clothes, and delicate fabrics may need different first steps.
| Situation | Best First Option | Use Caution With |
|---|---|---|
| Fresh underarm mark | Enzyme detergent or stain remover | Dryer heat |
| White cotton shirt | Oxygen bleach or enzyme detergent | Chlorine bleach |
| Colored shirt | Color-safe stain remover | Peroxide without testing |
| Dark or black shirt | Mild dish soap or color-safe product | Lemon juice or sun bleaching |
| Old yellow stain | Soak, pretreat, and repeat | Aggressive scrubbing |
| Waxy product buildup | Mild dish soap or enzyme detergent | Too much product |
| Light DIY treatment | Baking soda paste | Dark colors without testing |
| Delicate fabric | Mild detergent and gentle blotting | Harsh paste or hard scrubbing |
The best armpit stain remover depends on the fabric, the stain age, and the shirt color. A white cotton T-shirt can usually take stronger treatment than a dark synthetic shirt or a delicate dress shirt.
Vinegar may help loosen light residue, but it is not the strongest option for set-in yellow stains. Also, avoid mixing vinegar with bleach or random laundry products.
What Not to Use on Underarm Stains
Do not use chlorine bleach as the default stain remover. It can be too harsh for many garments, and it may make some sweat-related yellowing look worse.
Also, avoid putting stained clothes in the dryer. Heat can set leftover residue and make the mark harder to remove next time.
Hydrogen peroxide should not be used on colored or dark shirts without testing first. It can fade fabric that is not colorfast.
Lemon juice and direct sun are also risky on dark clothing. They may lighten dye and leave uneven marks.
Do not mix random stain removers together. Vinegar, peroxide, bleach, ammonia, and commercial products should be used carefully and according to their labels.
Finally, avoid hard scrubbing on delicate fabric. A cleaner underarm area is not worth thinning, stretching, or roughening the garment.
Why the Stains Come Back After Washing
If pit stains keep coming back, the issue is usually a buildup problem, not just a washing problem. Regular washing can remove surface dirt, but it may not fully break down deodorant, antiperspirant, body oil, and trapped residue.
Too much product can create a waxy layer that clings to fabric. As the garment is worn again, new moisture mixes with old residue, and the stain returns.
Dryer heat makes this worse. Even if the fabric looks clean when wet, a hidden mark can become more visible after drying.
Too much detergent can add another problem. Extra detergent does not always make clothes cleaner. It can leave residue behind, especially if the washer is overloaded or the rinse cycle is weak, so using the right detergent amount matters.
Hard water and washer buildup may also make underarm marks harder to remove. If many clothes look dull, stiff, or musty after washing, the issue may not be the garment alone.
How to Stop Them From Coming Back
The best way to prevent underarm stains is to stop residue before it sets into the fabric.
Let deodorant or antiperspirant dry before getting dressed. If the product is still wet, it can transfer directly into the fibers.
Use less product if you are applying several heavy layers. More deodorant does not always mean better protection, and extra product can leave more residue behind.
Wash sweaty clothes sooner instead of leaving them in a hamper for days. This gives body oil and underarm residue less time to settle into the fibers, which can also help reduce trapped sweat smell in clothes
Pretreat favorite white T-shirts before the stain becomes dark yellow. A quick treatment after heavy sweating can prevent a long-term mark.
Wear an undershirt with dress shirts if you get heavy underarm staining. It can protect the outer garment and reduce visible patches.
If the same marks keep returning, consider changing your deodorant or antiperspirant. Some people notice fewer yellow stains after switching products, especially if their current product leaves heavy buildup.
Also, avoid repeated dryer heat on clothes that still have underarm marks. Air drying gives you a chance to check the fabric before the stain becomes harder to remove.
Final Takeaway
Armpit stains are easier to remove when you treat them before dryer heat sets them deeper. Start by identifying whether the mark is yellowing, deodorant buildup, dark residue, or an old set-in patch. Then choose a fabric-safe treatment based on the shirt color and care label.
White shirts, colored shirts, dark shirts, and delicate fabrics do not all need the same method. Use oxygen bleach, enzyme detergent, mild soap, baking soda paste, or color-safe stain remover when appropriate. Once the fabric is clean, prevent new marks by washing sooner, using less product, letting deodorant dry, and avoiding heat until the underarm area is fully clean.
Sources:
American Cleaning Institute: https://www.cleaninginstitute.org
University of Georgia Extension: https://site.extension.uga.edu/textiles/care/stain-removal/
Vanish Arabia: https://www.vanisharabia.com/stain-removal/body-stains/how-to-get-rid-of-armpit-stains/
